Mie University Google Workspace
1. Introduction
In order to prevent unauthorized access, the University will also introduce two-factor authentication. two-factor authentication can be configured in Google Workspace, so please refer to the configuration instructions to set it up.
Step 9 completes the two-factor authentication. 10. The following is the setup using the two-factor authentication application.
The procedure is the same for both Student Mail and Mie University Sansui Mail.
If you do not have a cell phone or smartphone, you can use a landline phone. In that case, please select "voice call".
However, please note that you will not be able to "log in" at locations where that landline phone is not available.
Administrative staff's position e-mail (Sansui Mail)
4. Additional registration or modification of two-factor authenticationPlease register your workplace phone number in advance.
Then, when taking over e-mail upon transfer, delete all settings except the workplace phone number before the transfer, and the successor should set it up again.
Then, when taking over e-mail upon transfer, delete all settings except the workplace phone number before the transfer, and the successor should set it up again.
2. Setup Method
Setting up two-factor authentication
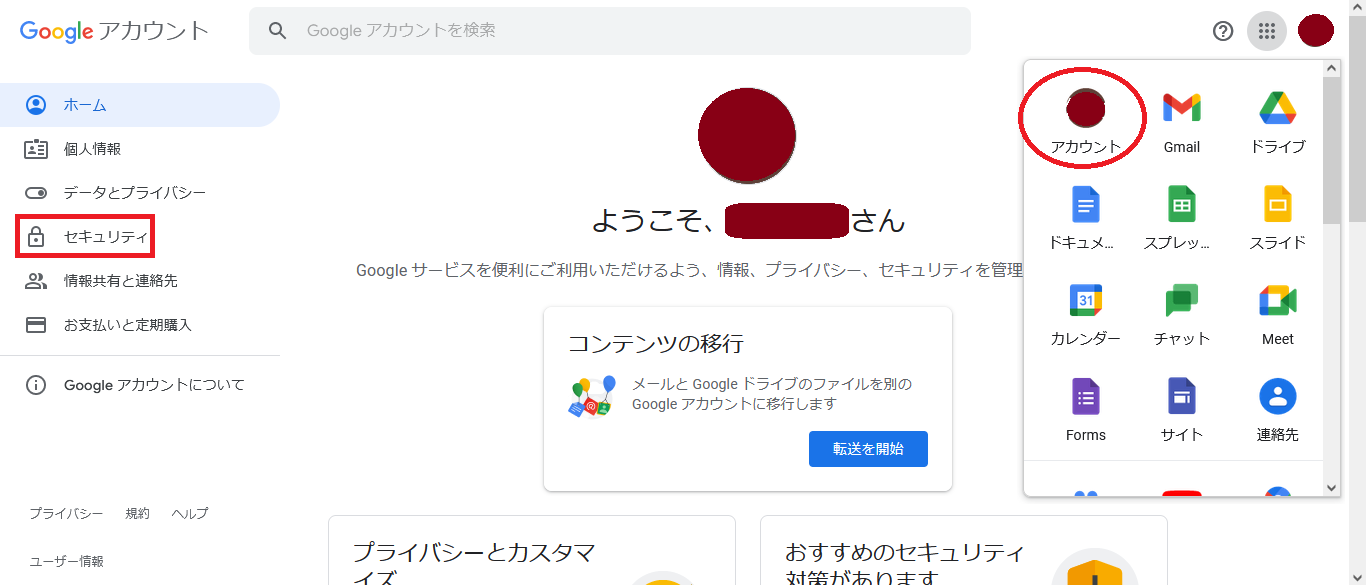
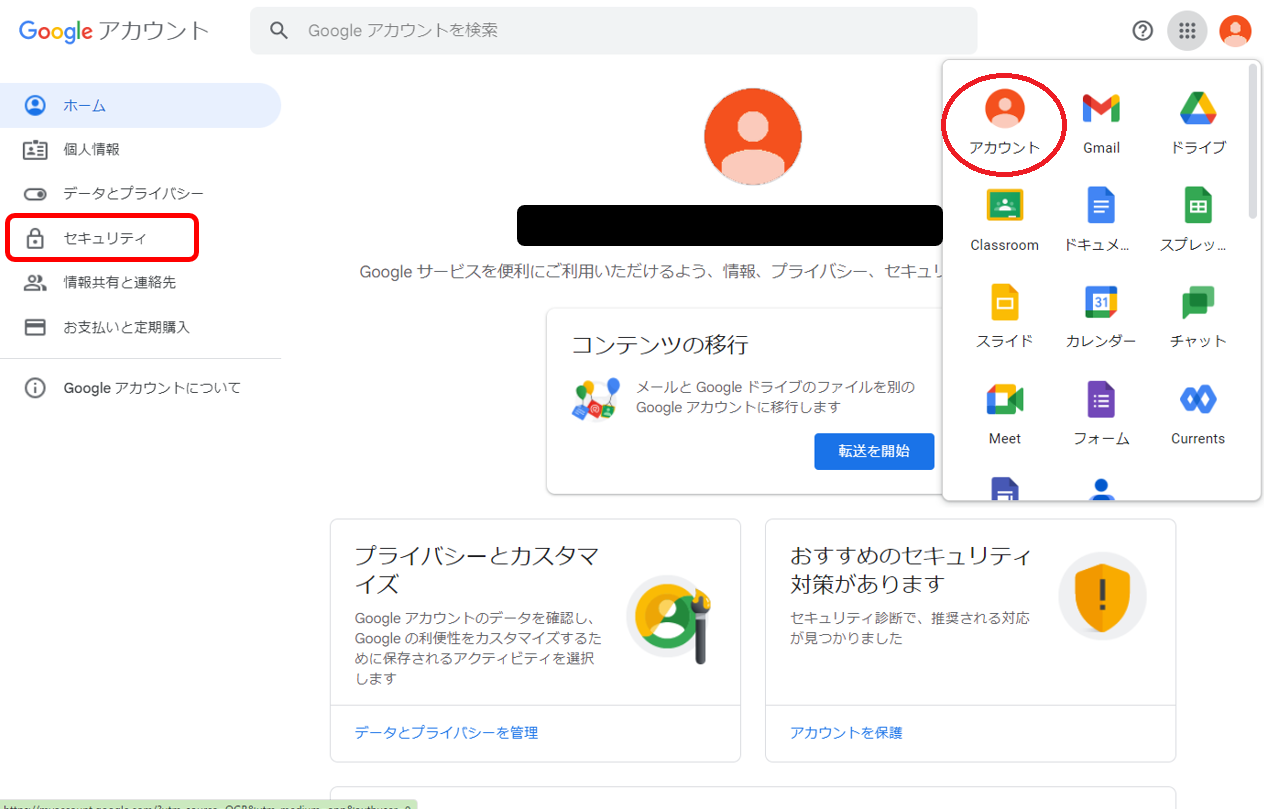
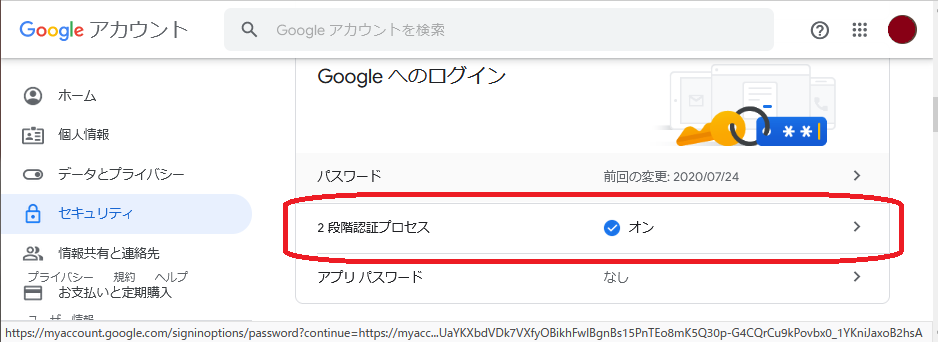
- After logging in with your Google Account, click on Account, then click on Security from the menu on the left side.
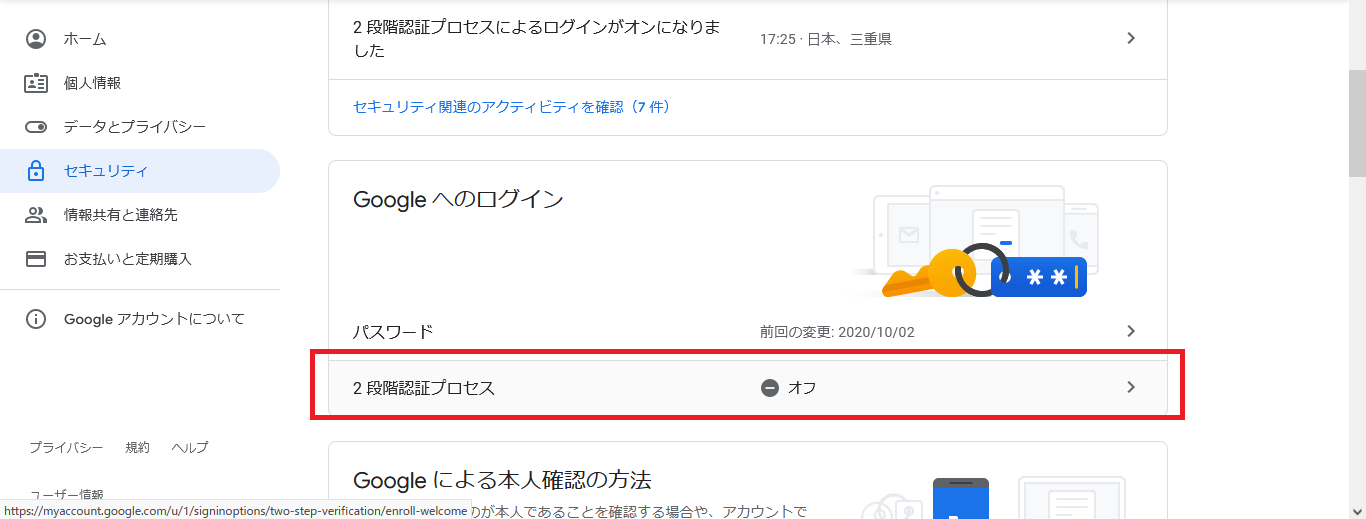
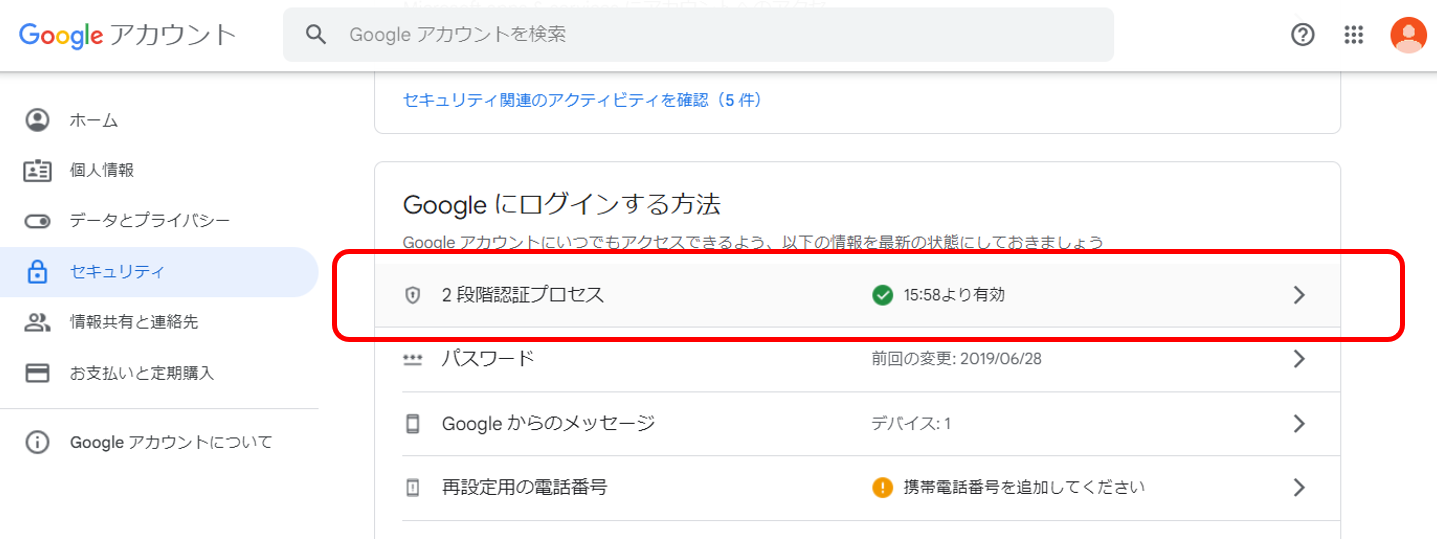
- Scroll down a little and you will see an item called Two Factor Authentication Process. Click on it.
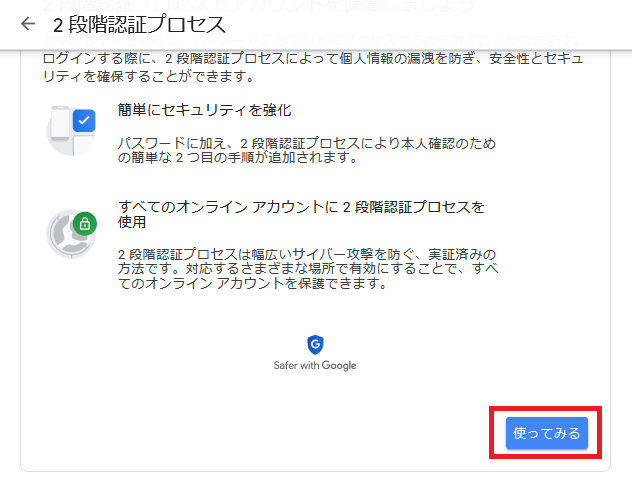
- Click on "Try it."
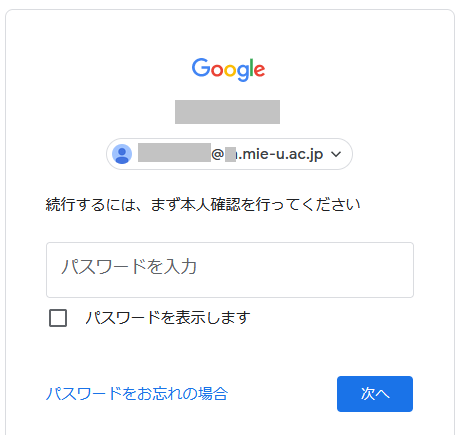
- You will be prompted for a password. Enter your password and click "Next.
- Enter your phone number, select text message or voice call, and click "Next.
Sorry, this request is currently..." error, please click here

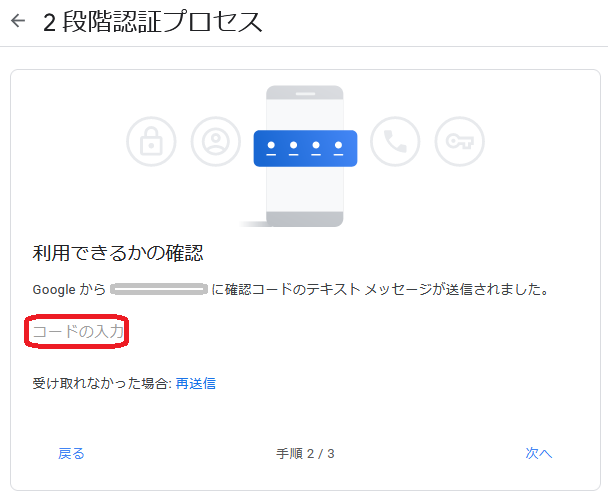
- A confirmation code will be sent to a short message or phone call on your phone.
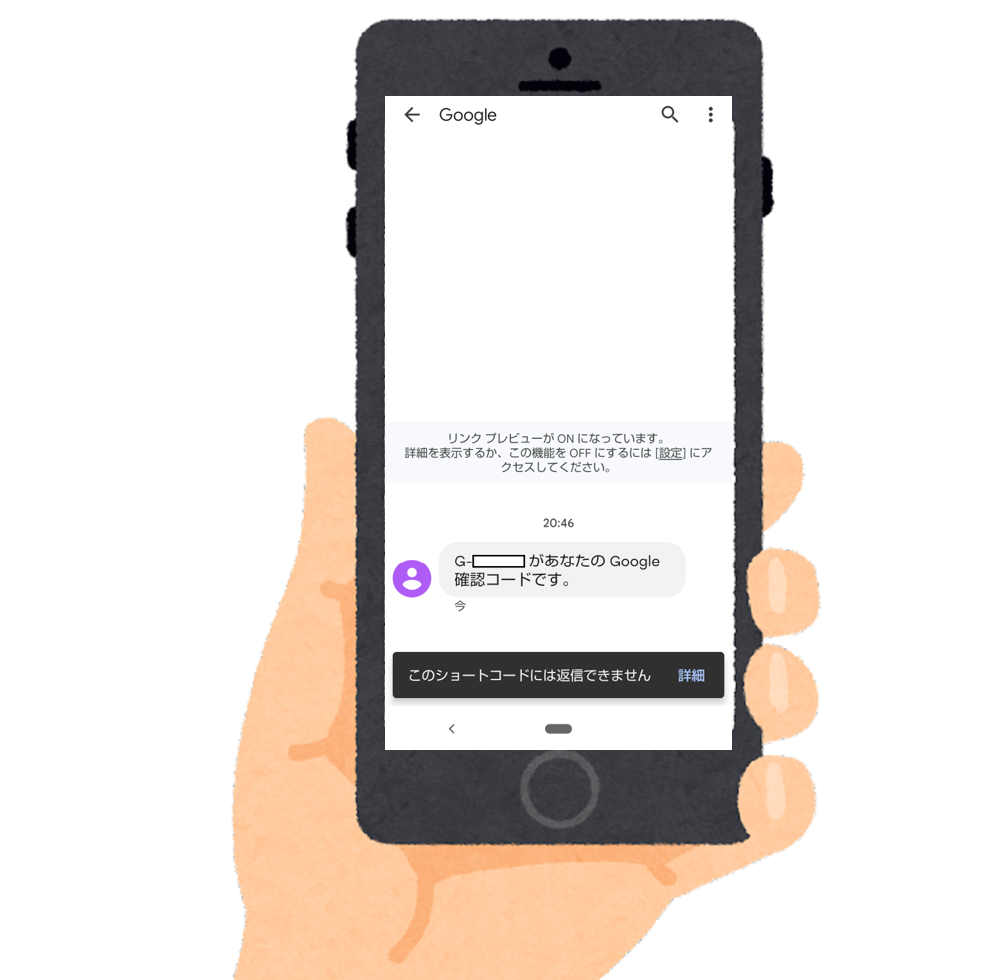
- Enter the confirmation code and press "Next".
- You will be asked if you want to enable two-factor authentication. Click "Enable" to enable two-factor authentication.
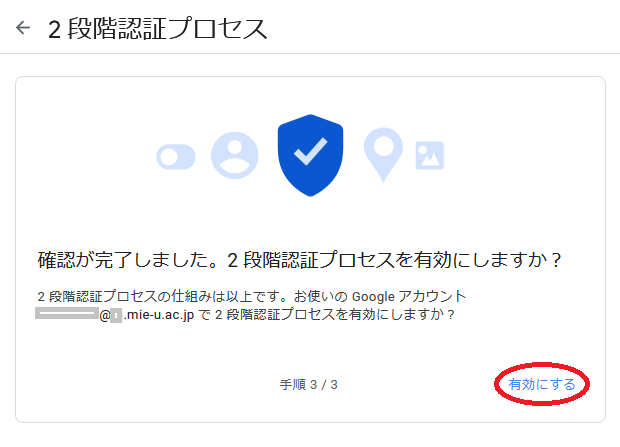
- Two-factor authentication is now enabled.
- Thereafter, you will be set up to use the application for two-factor authentication. If you are using the application, you will need to do this work. If you do not use the application, you may finish the work here.
Advance preparation
Install the Google Authentication System app on your phone.
- Android users can click on Google Authenticator or search for Google Authenticator in Google Play and install it.
- iPhone users can click on Google Authenticator or search for Google Authenticator in the Apple Store and install it.
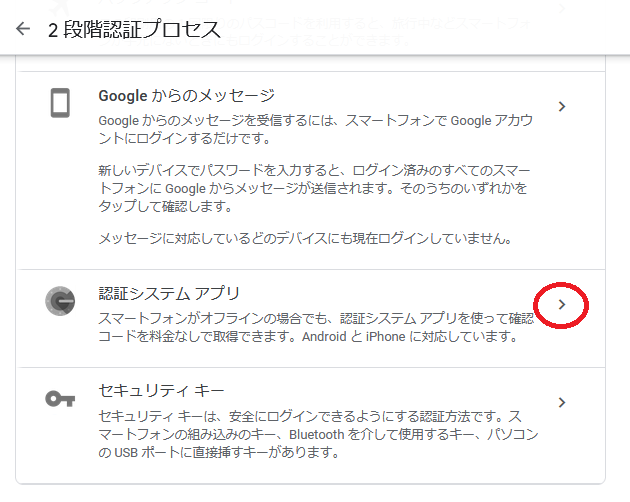
- Scroll down to the bottom of the 2-factor authentication process screen, and you will see an item called "Authentication System Application", click on it.
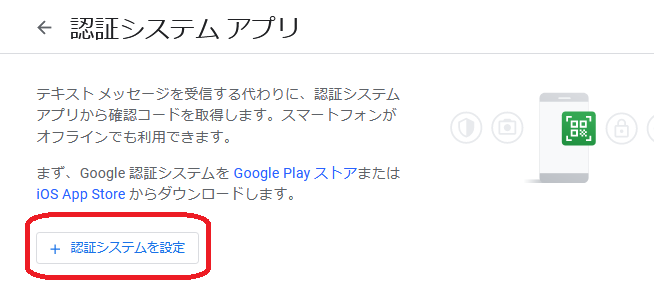
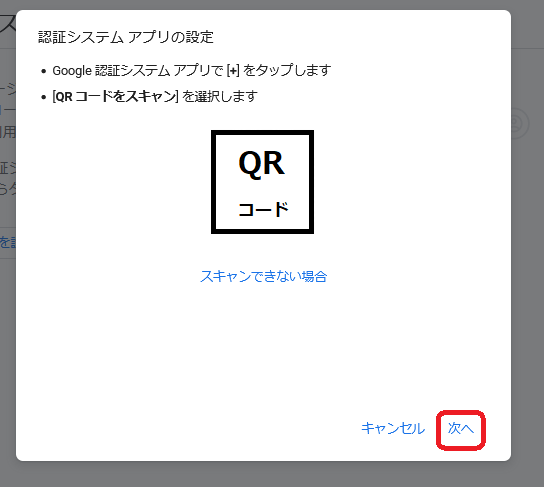
- + Click Configure Authentication System.
- A QR code will be displayed.
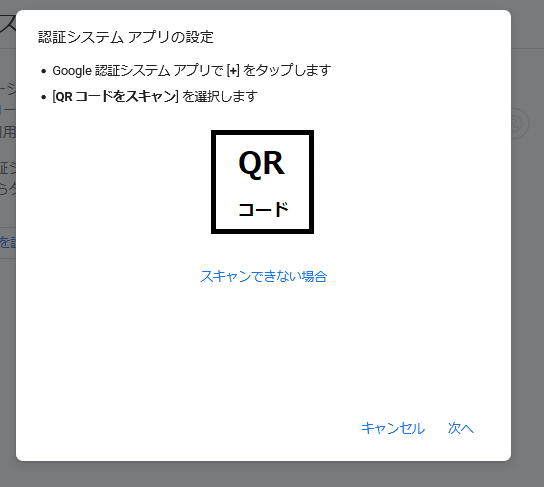
- On the phone side, launch the Google Authentication System app and tap "Scan QR Code".
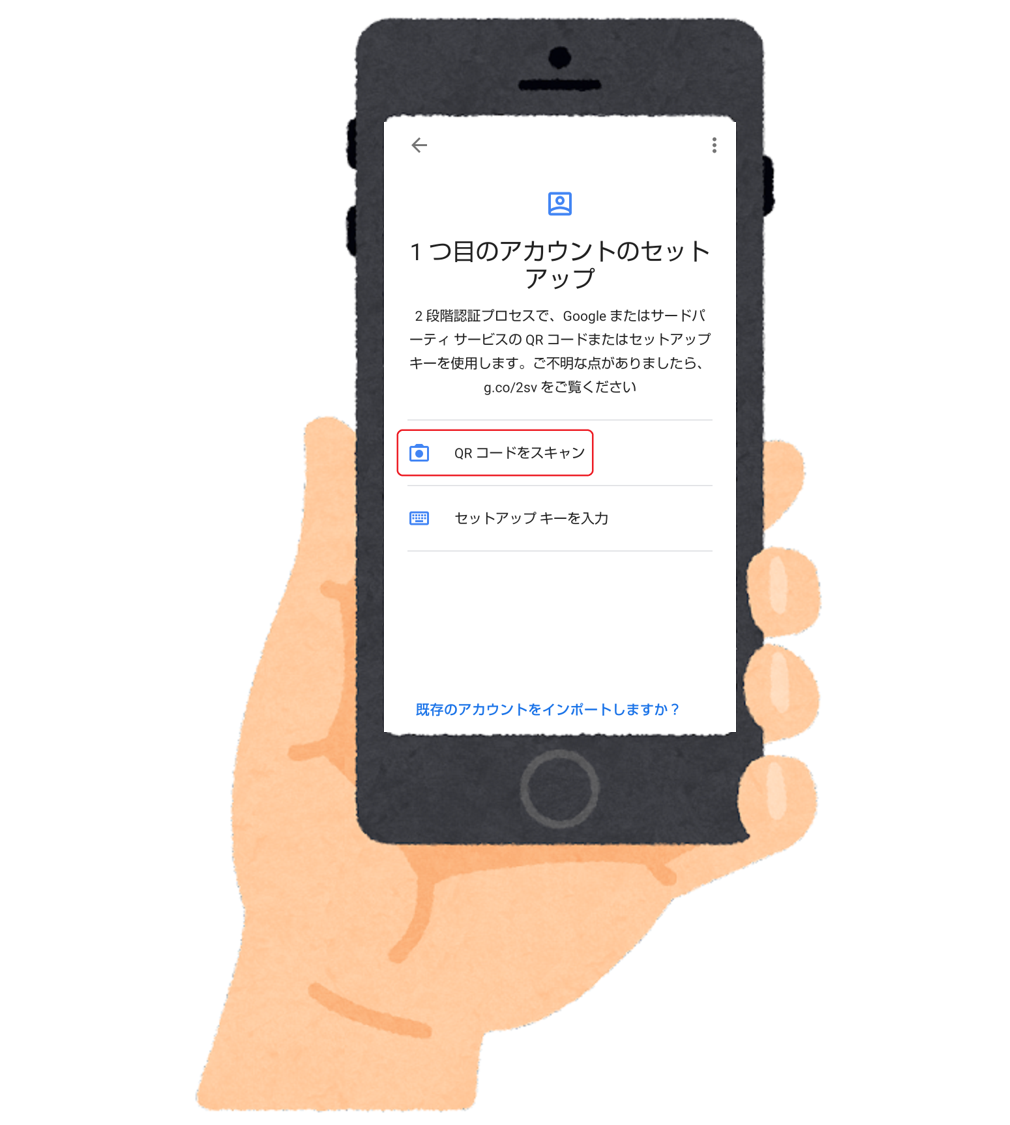
- The camera will launch and scan the QR code. Once the scan is complete, your account will be added.
- Once the account has been added, return to the computer screen and press Next.
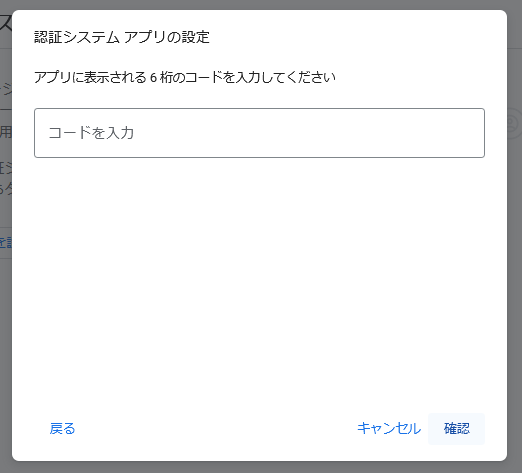
- Enter the 6-digit number displayed in the authentication system and press the Confirm button.
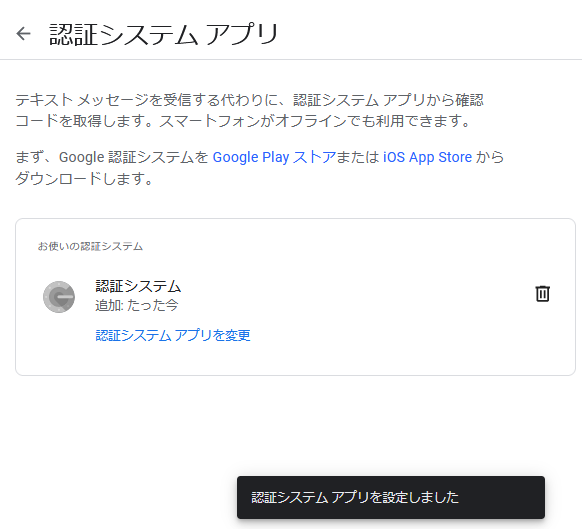
- Authentication system application has been set up. Two-factor authentication setup is complete.
3. How to check if it is set up
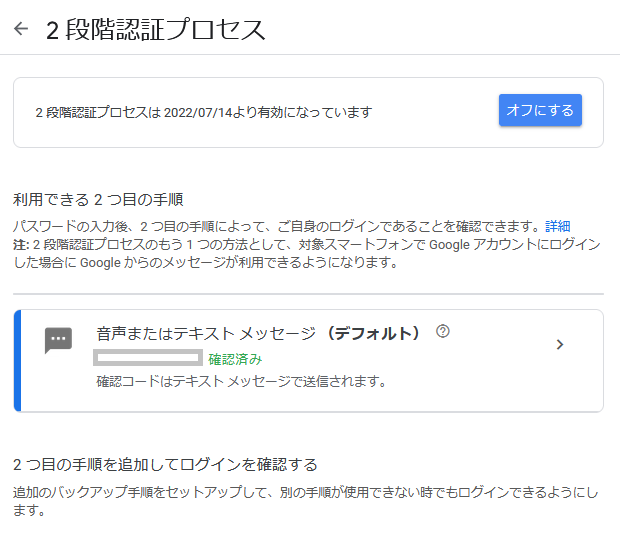
- Click on Account, then click on Security from the menu on the left.
- Scroll down a little and you will see an item called "2-step verification process. If this is set to "Enabled," you have successfully completed the setup.
4. Flow of logging in after setup
- After setting up two-factor authentication, try logging in to Google.
Try logging out of Google and then logging back in to Google.
- After entering your password, press Next.

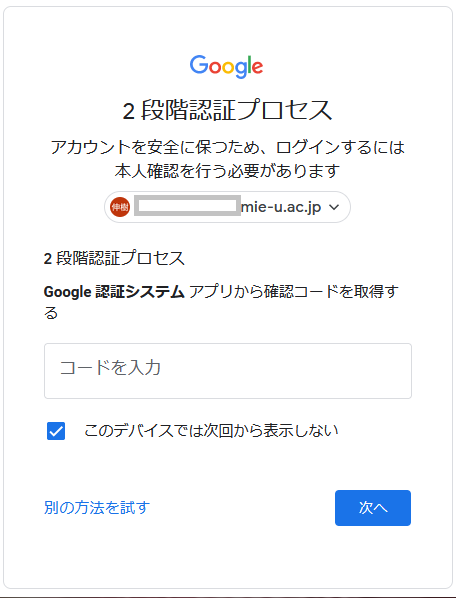
- The confirmation code input screen for two-factor authentication will appear.
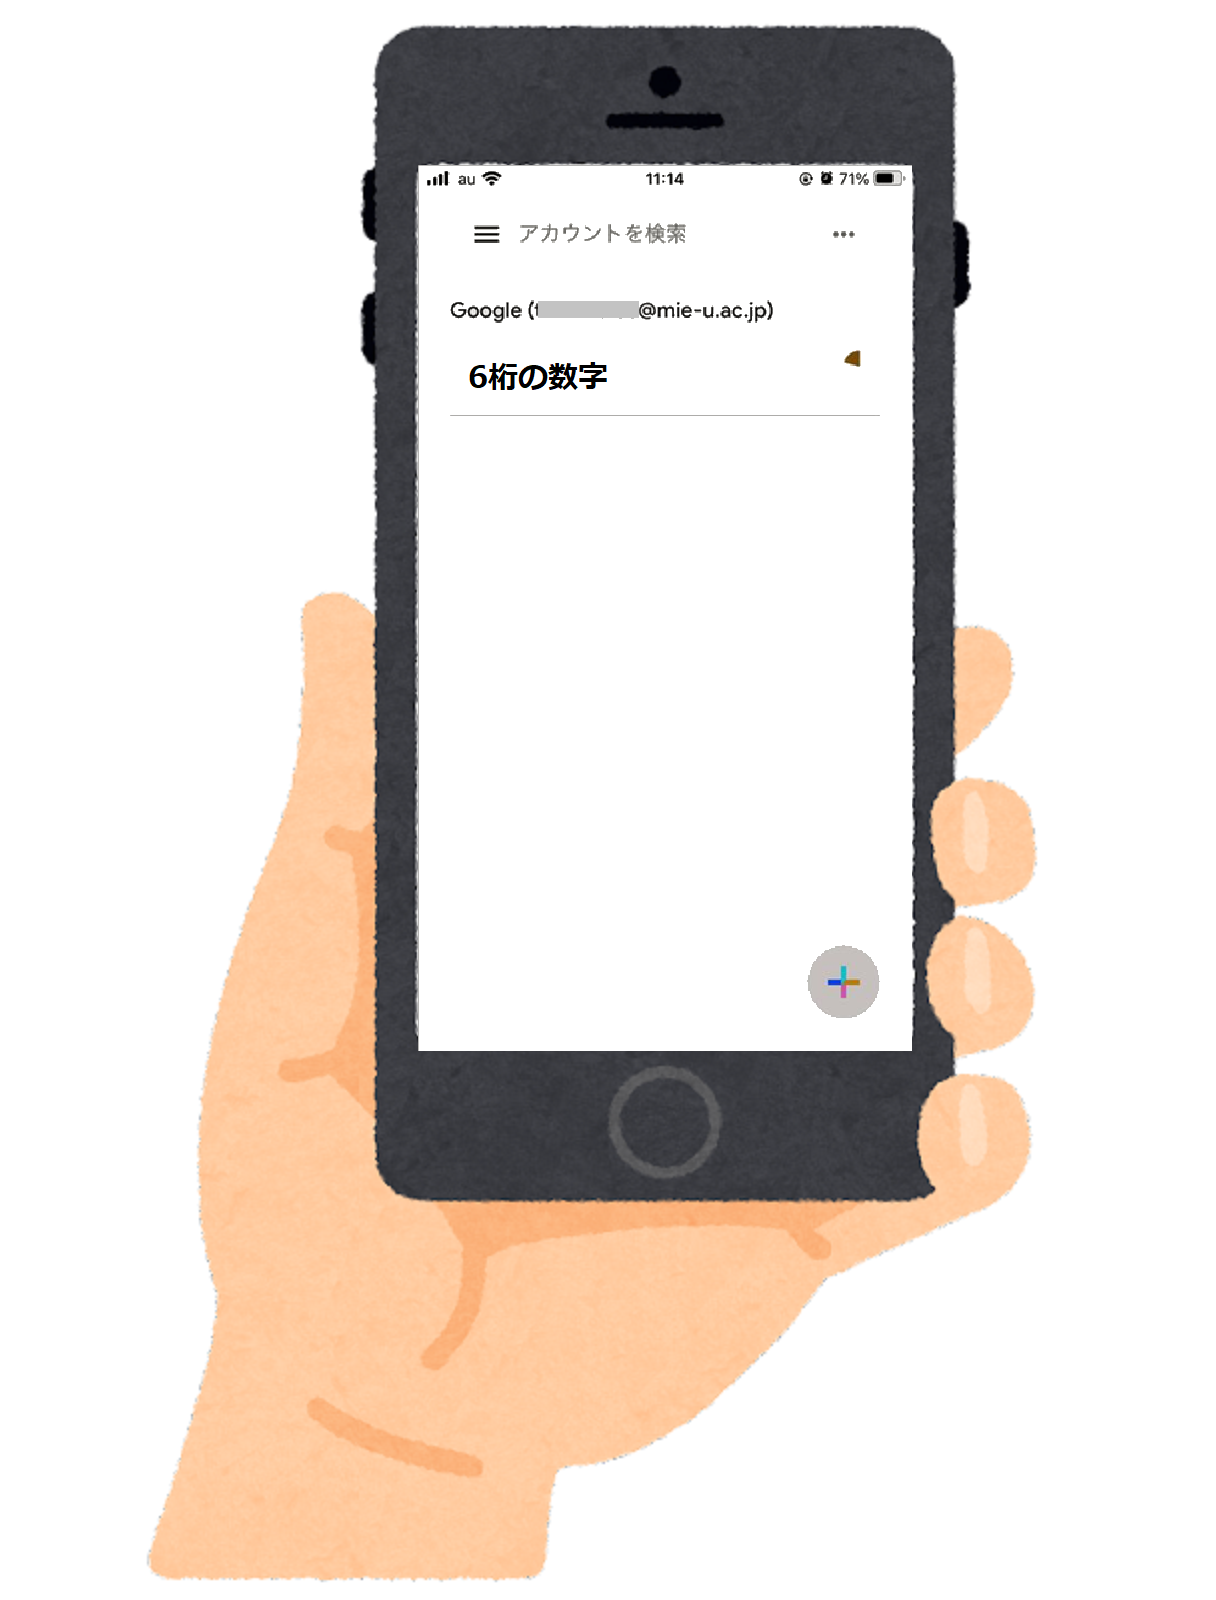
If you have set up a short message, check your short message; if you are using an authentication app, start the authentication app, and check and enter the 6-digit number. (The image shows the case of using the authentication app on your phone).
At this time, if you check the "Do not display on this device next time" checkbox, you can log in without two-factor authentication next time on that device.
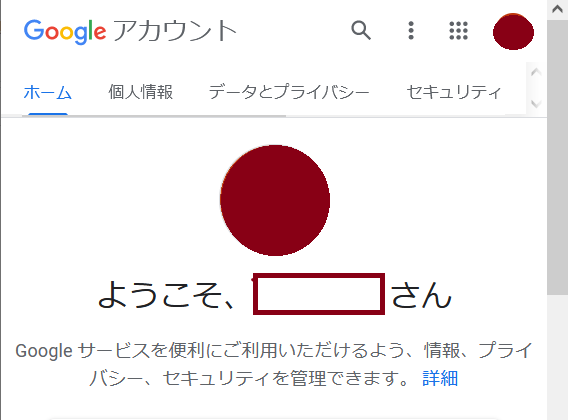
- I was able to log in.
5. Additional registration or modification of two-factor authentication
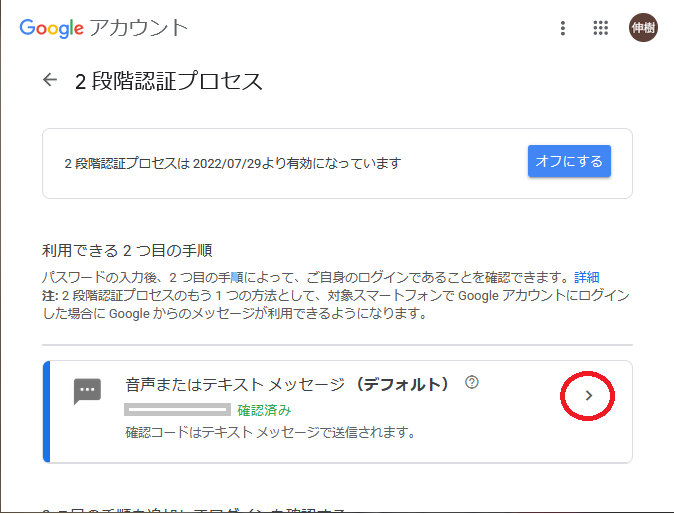
- You can register additional two-factor authentication, for example, if you want to register multiple phone numbers. Click on your account, then click on Security from the menu on the left.
- Scroll down a little and you will see an item called Two Factor Authentication Process. Click on it.
- You will be prompted for a password. Enter your password and click "Next.
- This will take you to the setup screen for the two-factor authentication process. This section explains how to add a phone number. Click on the right side of where the phone number is displayed.
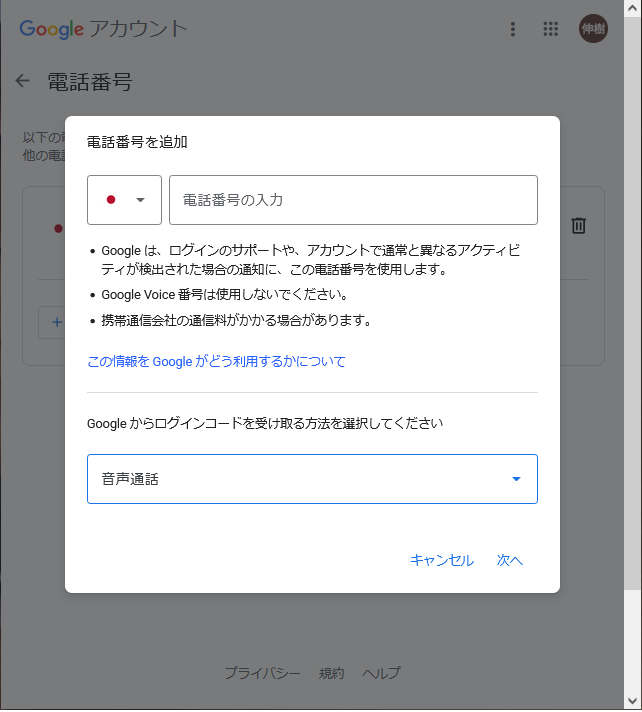
- Click on "Add another phone number."
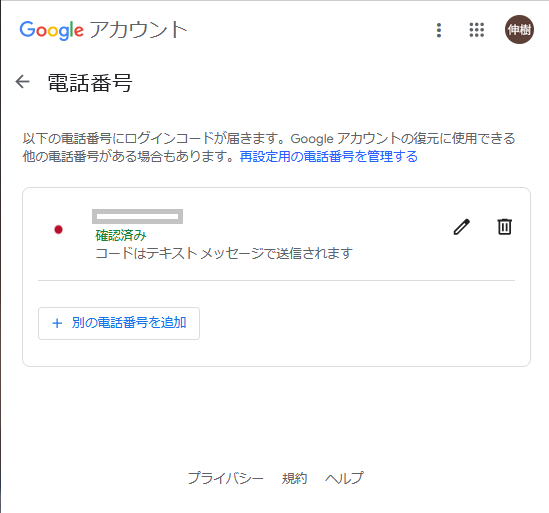
- Enter your phone number and press Next. If you are using a mobile phone or landline, please set "Voice Call".
- The number has been added. You can use "Confirm Phone Number" as a two-factor authentication with or without "Confirm Phone Number", but please check your phone number to make sure your settings are correct.
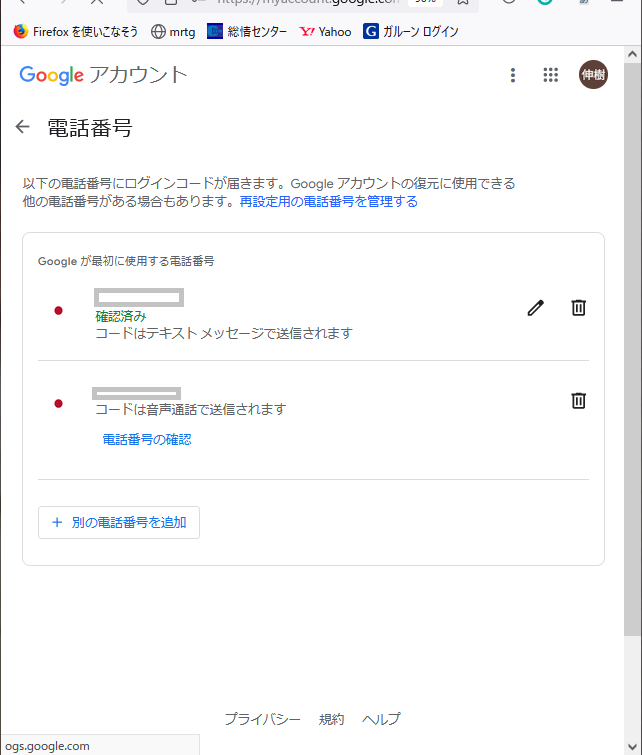
6. Removal of Two Factor Authentication
- This is a method of deleting past settings, such as when you switch your cell phone to another company and your phone number changes. At this time, at least one setting must remain.
Click on Account, then click on Security from the menu on the left.
- Scroll down a little and you will see an item called Two Factor Authentication Process. Click on it.
- You will be prompted for a password. Enter your password and click "Next.
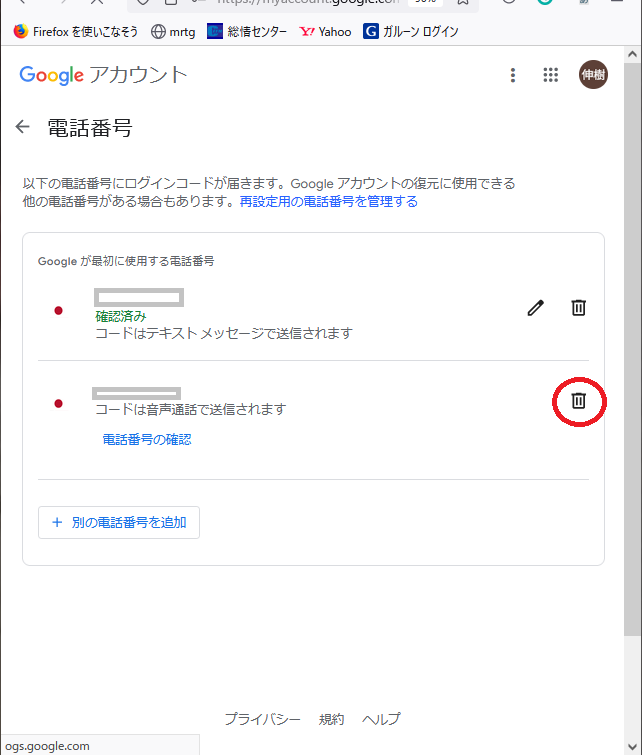
- This will take you to the settings screen for the two-factor authentication process. This section explains how to delete a phone number. Click on the right side of where the phone number is displayed.
- Click on the trash can icon to the right of the appropriate phone number.
- You will be asked "Do you want to delete the phone number from your account? You will be asked to click OK.
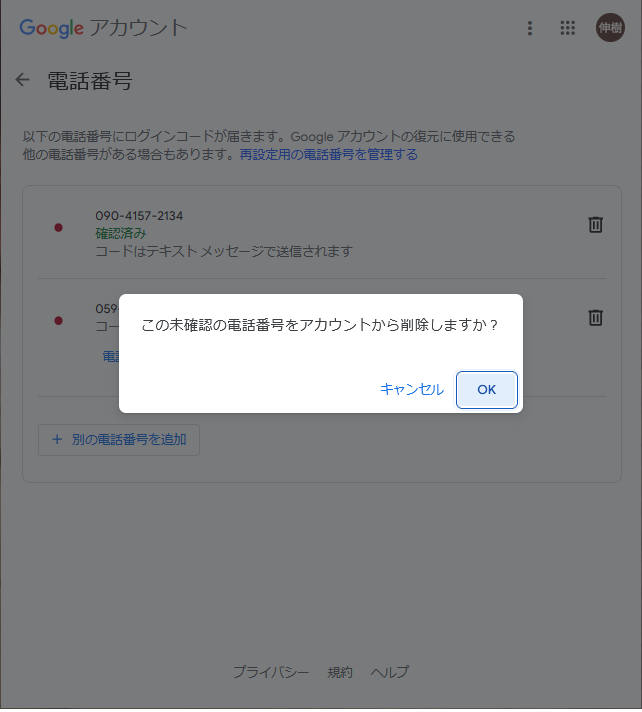
- The registered phone number has been deleted.