Secure VPN Connection Service(IPsec VPN)
Steps for Using on Mac
- Install FortiClient VPN.
Click hereand Please download Installer 「FortiClientVPN_mac.dmg」
※When downloading from outside the university, you must enter your unified account credentials.
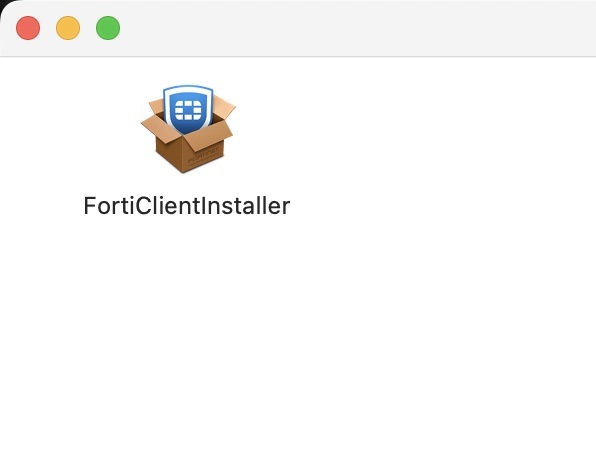
※ Download from the official page here - When you open the downloaded dmg file, the following screen will appear. Click “FortiClientInstaller”.
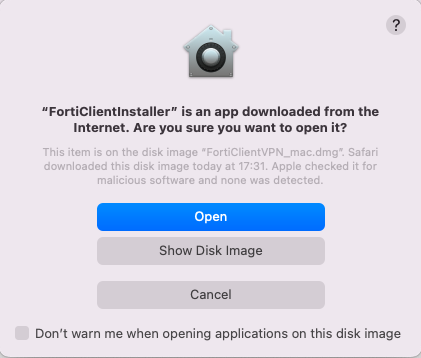
- “FortiClientInstaller is an application downloaded from the Internet. Do you want to open it?” will appear. Click “Open”.
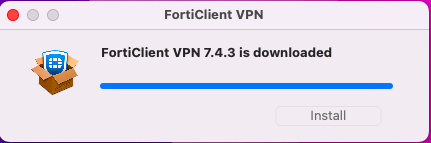
- After that, the data download will begin, so please wait until the download is complete. The download may take several minutes to finish.

- After the download completes, press “Install”.
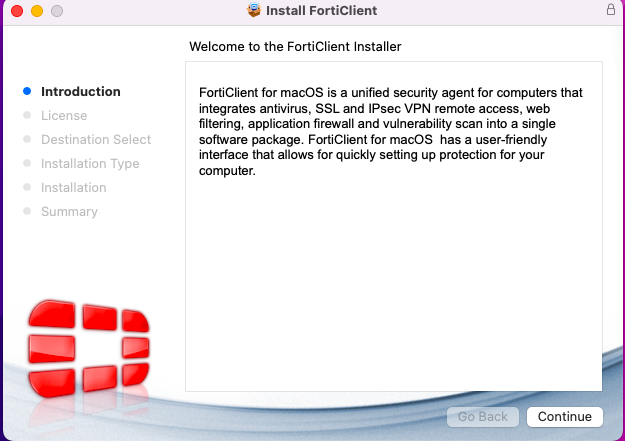
- After installation, the following screen will appear. Please follow the on-screen instructions and press “Continue.”
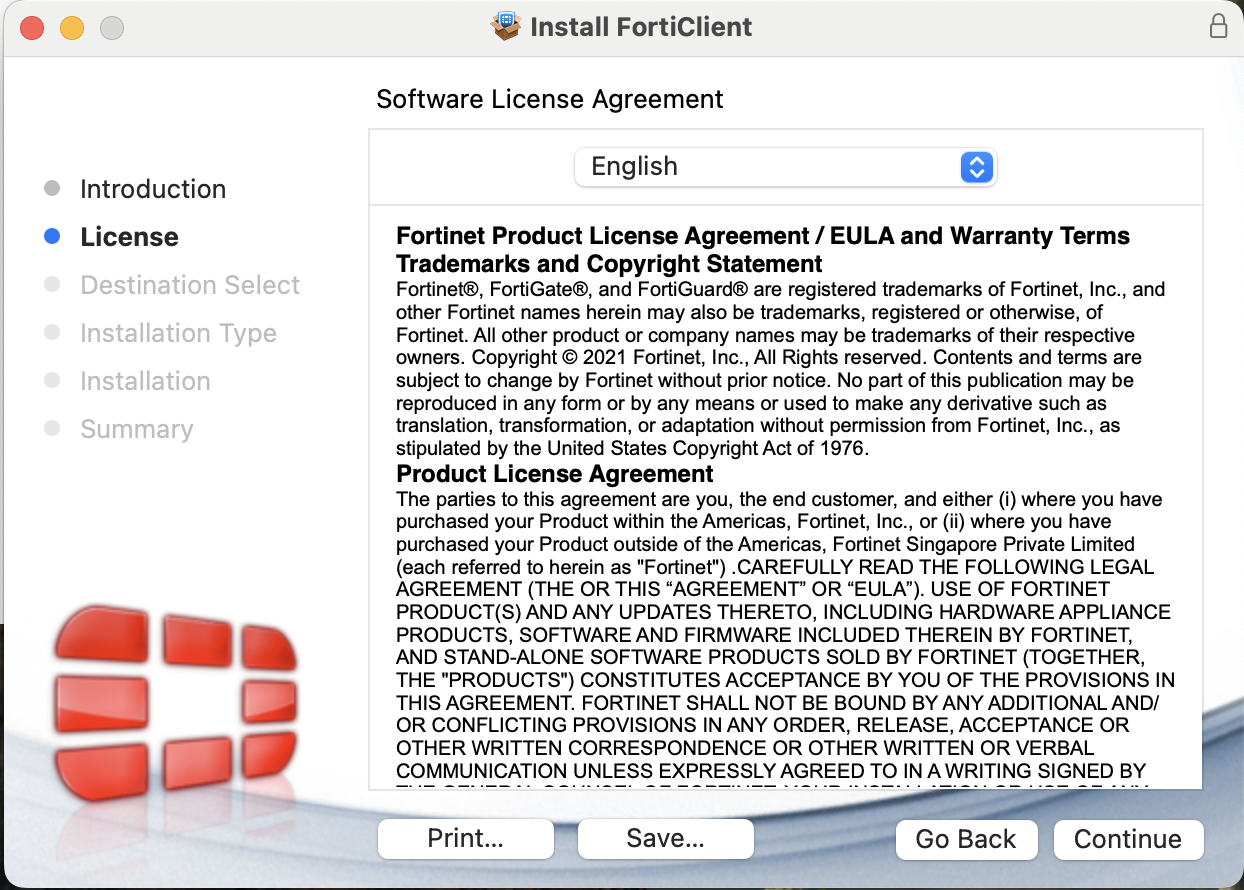
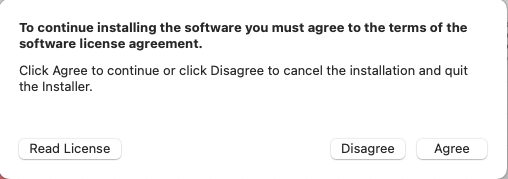
- Read the License Agreement and press “Continue”/“Agree”.
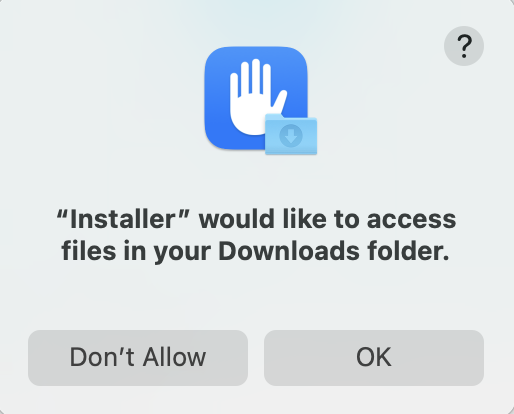
- “The installer is attempting to access files in the ‘Downloads’ folder.” Press “Allow”.
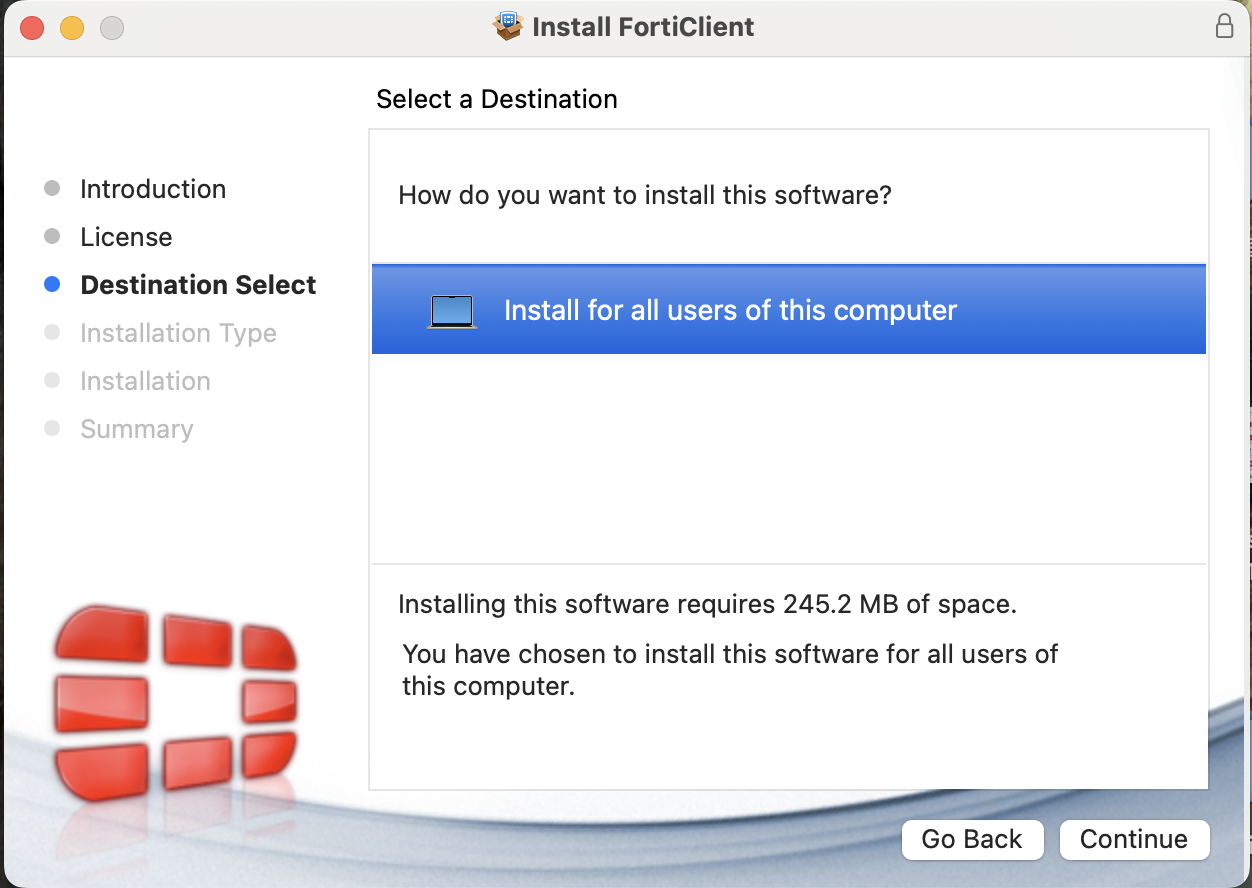
- Select “Install for all users on this computer” as the installation location, then click “Continue”.
- The installation screen will appear. Click “Install”.

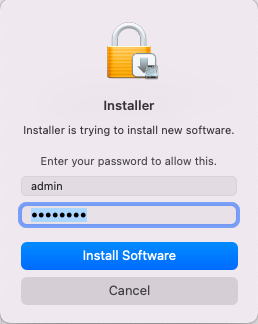
- Before installation, you will be prompted for a password.
Here, enter your computer ID and password, then click “Install Software.”
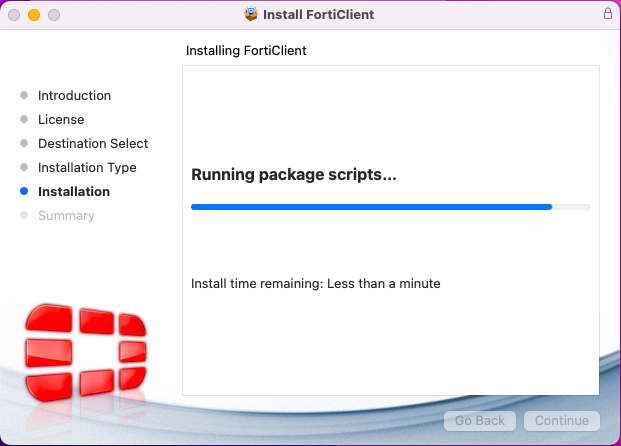
- After entering your password, the installation will begin. The installation will take several minutes to complete.
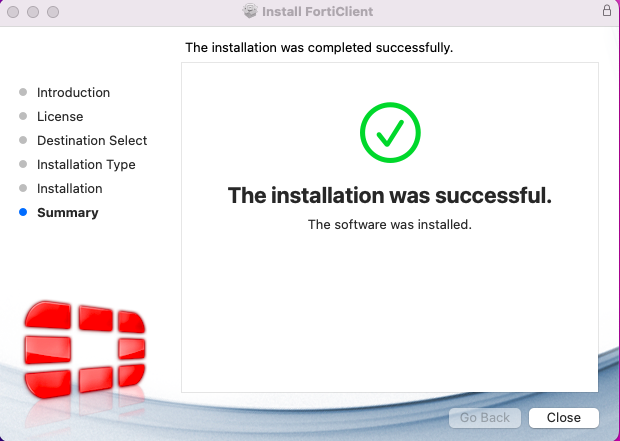
- Once the installation is complete, the following screen will appear.
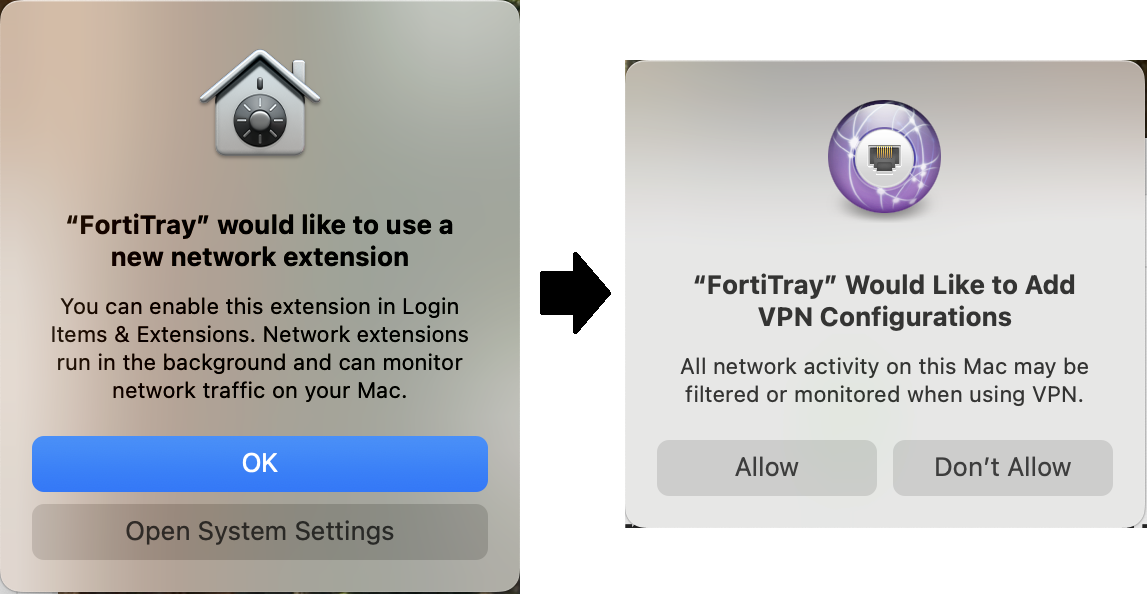
Upon completion of the installation, the following screen may appear.
If prompted, click “Open System Settings” and then click “Allow”.
After opening System Settings, please turn on "FortiTray". If you pressed it by mistake, please follow the procedure below for non-connections.
- After installation is complete, the FortiClient VPN icon will appear in the upper-right corner.
When you click, “Open Client Console” will appear; please select this option.
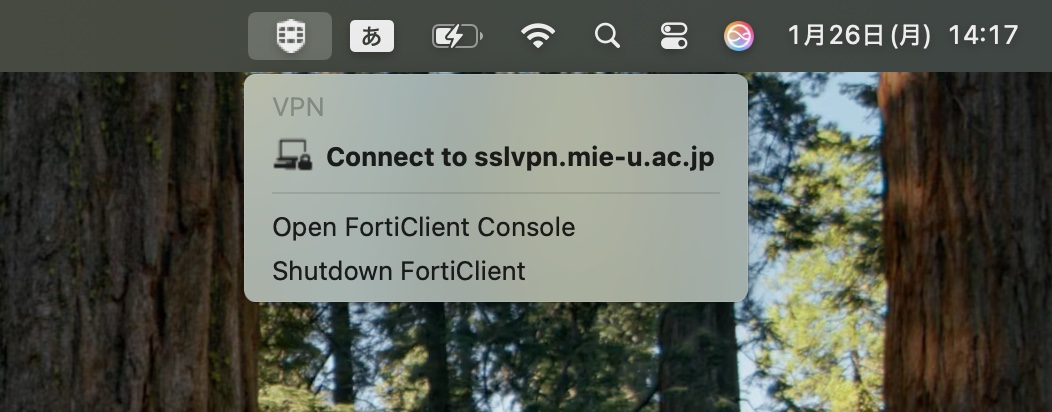
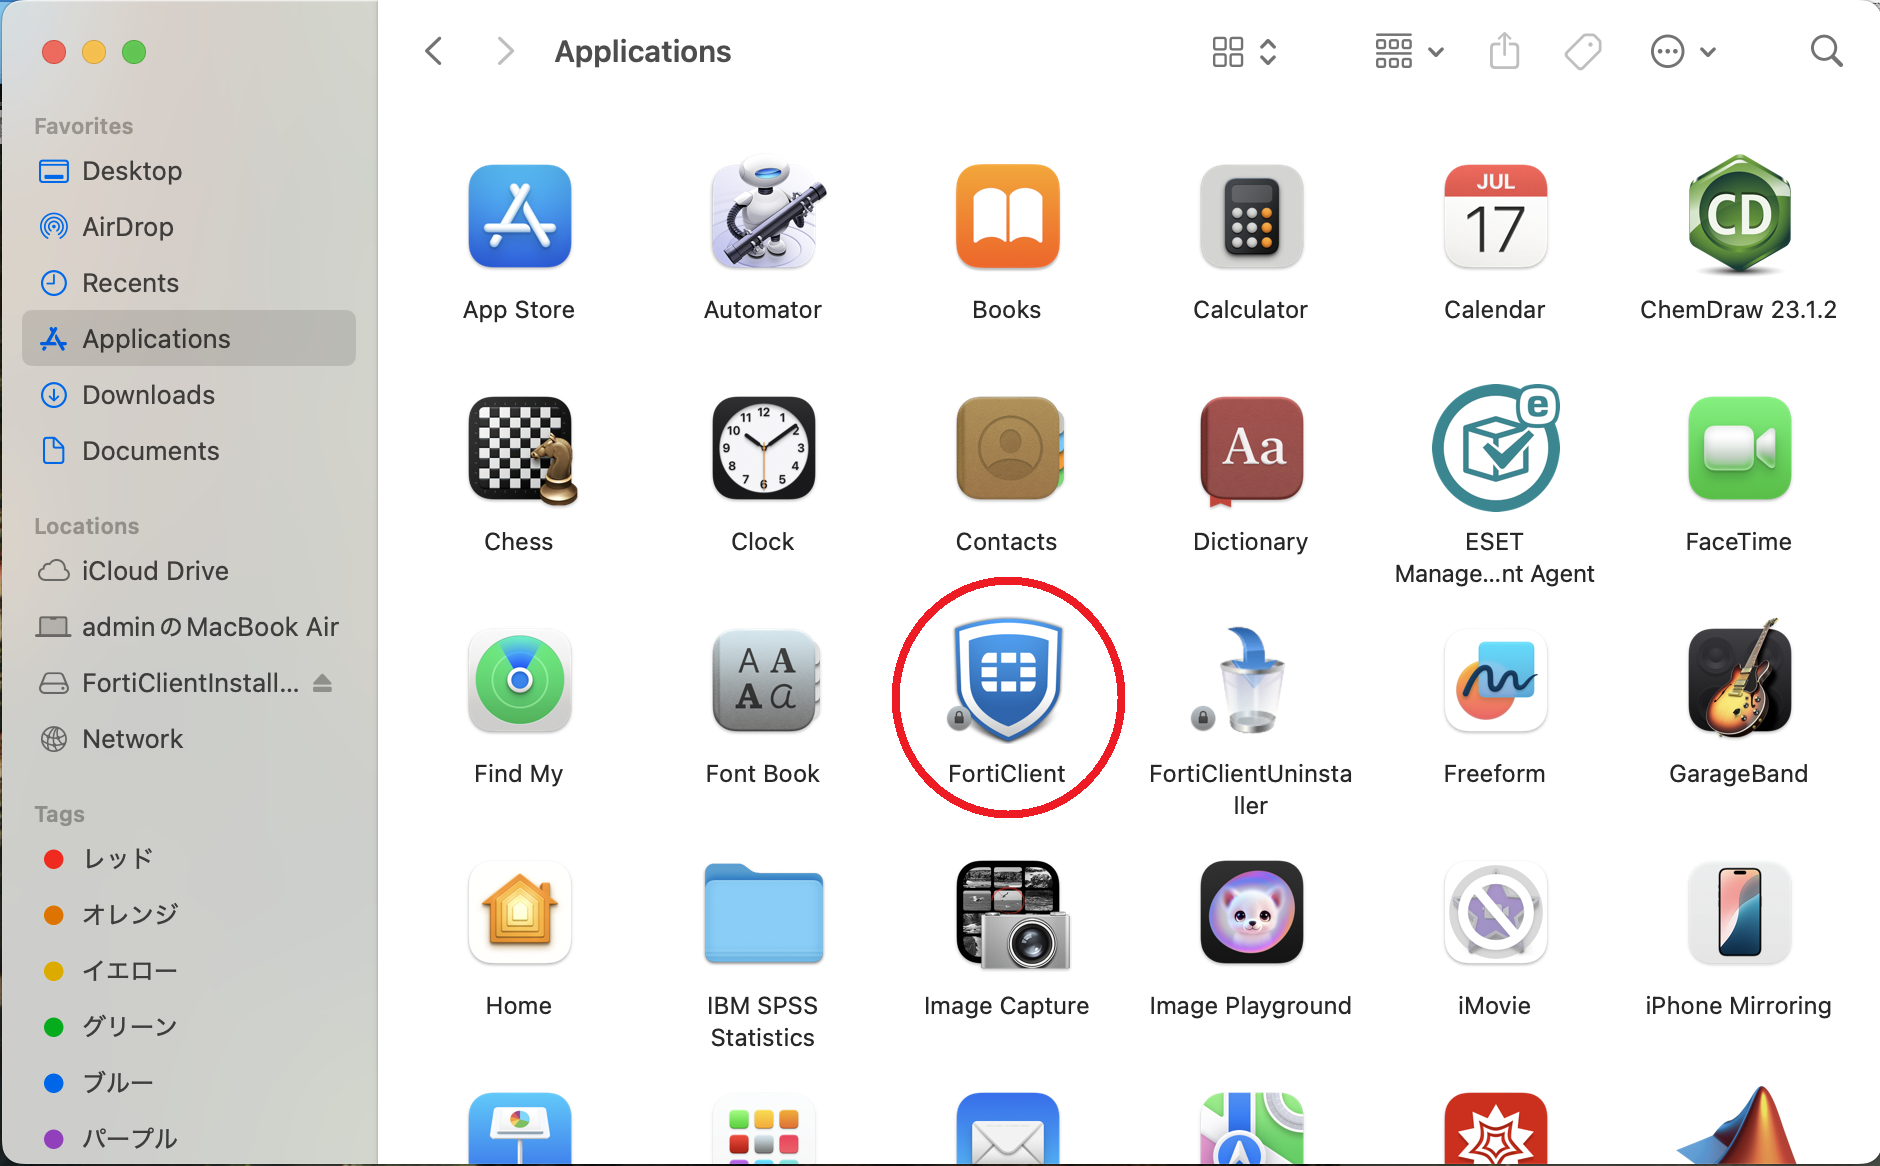
If you accidentally closed it, please locate FortiClient in the Applications folder and run it to reopen the application.
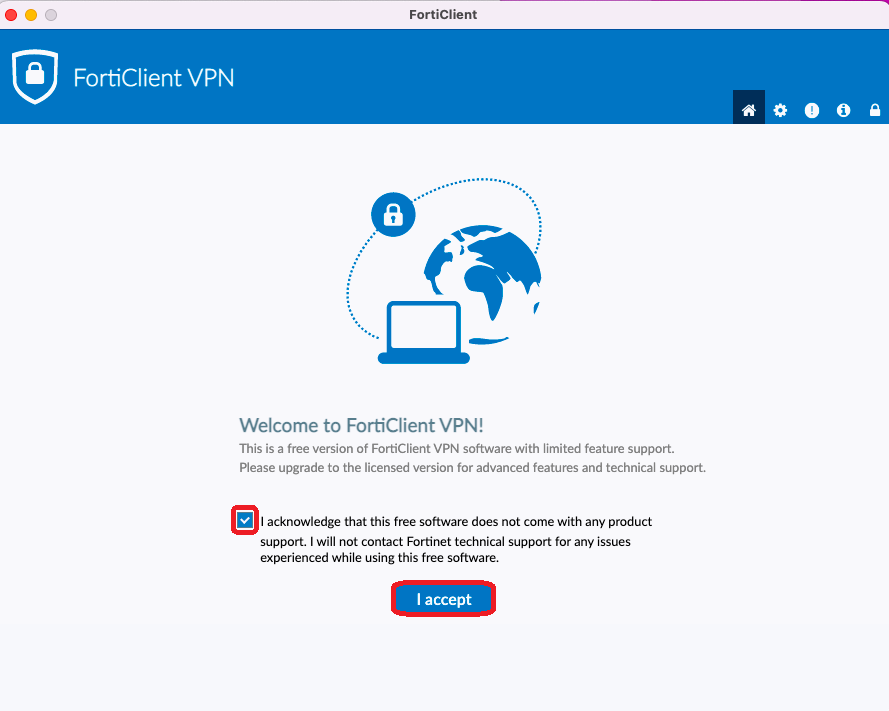
- Please acknowledge and agree that FortiClient VPN does not include product support.
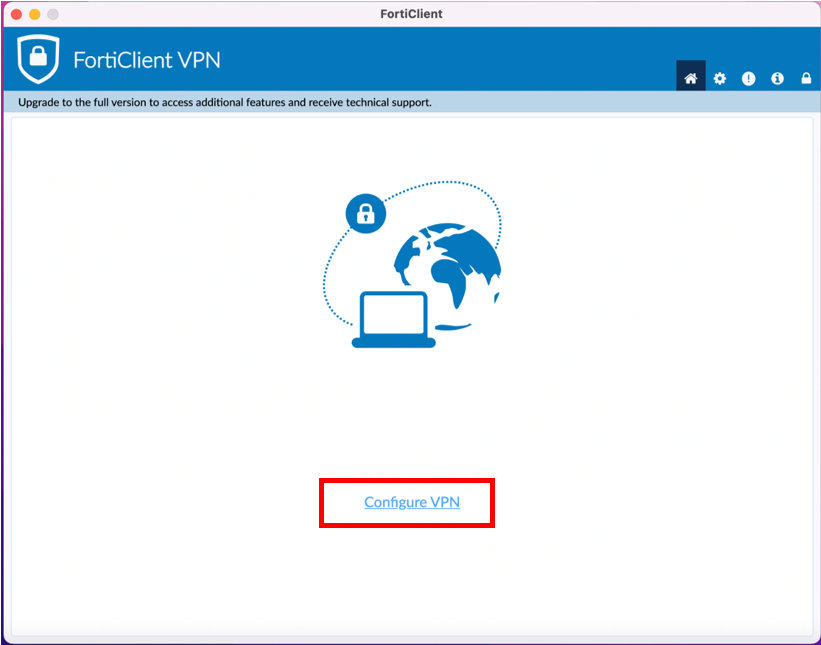
- Click “Configure VPN” at the bottom center of the screen.
- “New VPN Connection” will appear. Please enter the following information.
- VPN:IPsec VPN
- Connection name:ipsecvpn.mie-u.ac.jp
- Remote GW:ipsecvpn.mie-u.ac.jp
- Authentication Method: Pre-Shared Key
- Click here to enter the Pre-Shared Key.
- Authentication: Save username
- Username: Unified Account ID
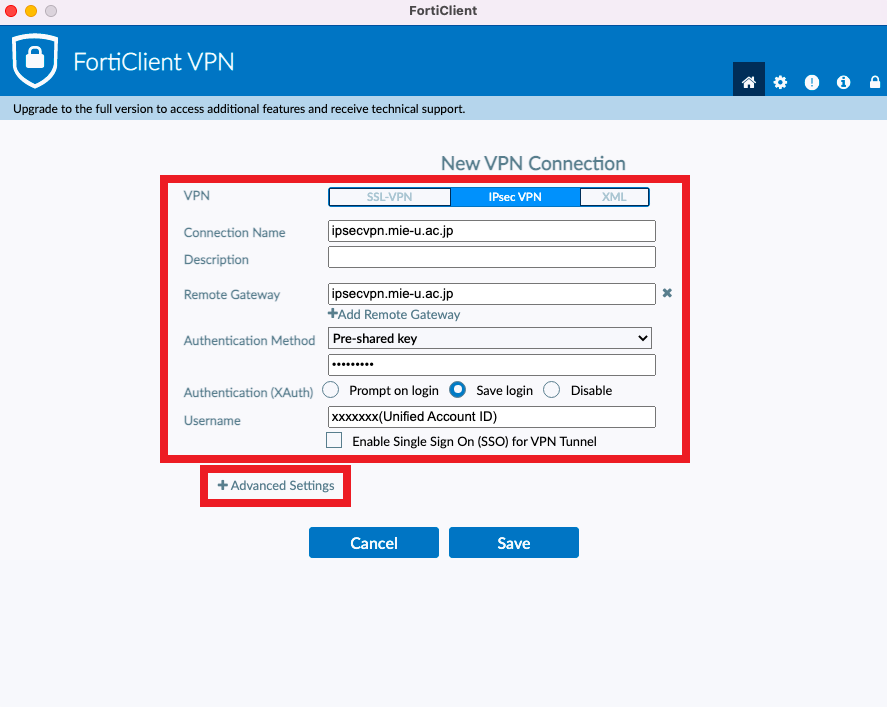
- Click Advanced Settings to open Phase 1, then enter the following:
- DHgroup :5
- Local ID:
(For faculty and staff) staff
(For student) student
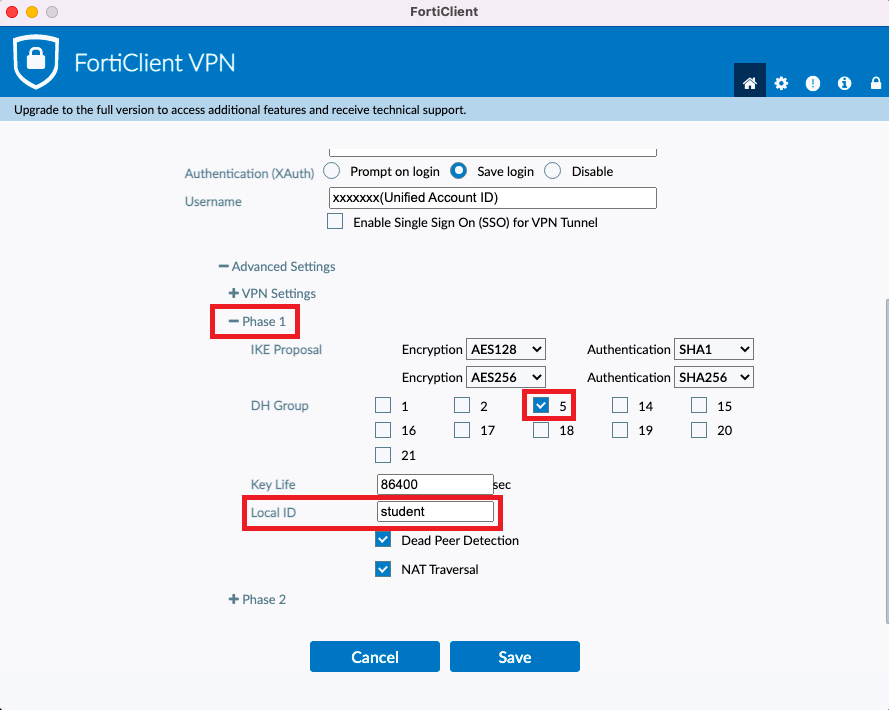
- Open Phase 2 and enter the following:
- DHgroup:5
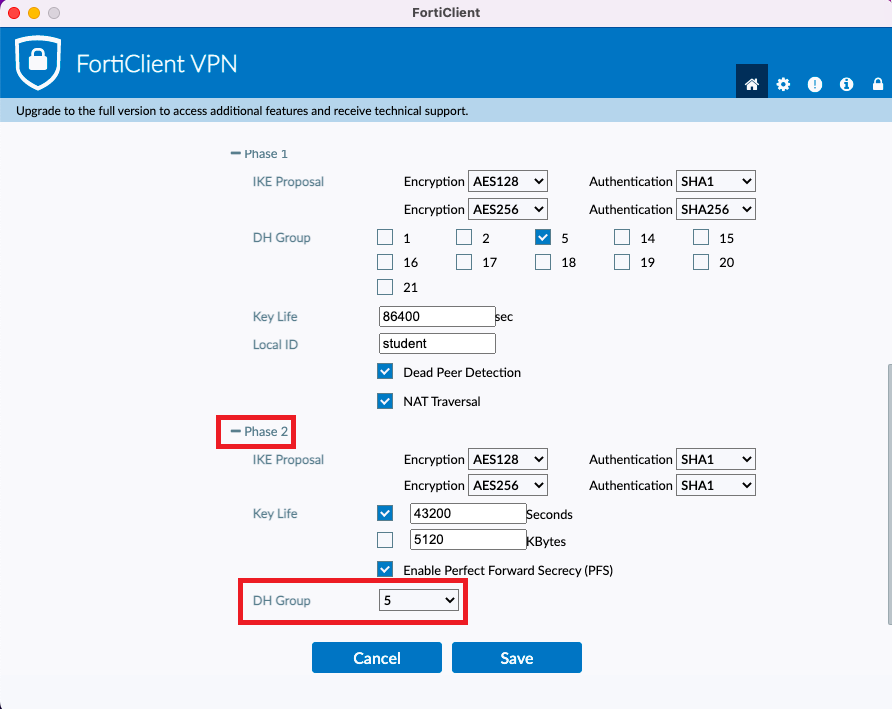
-
Press “Save” on the settings screen.
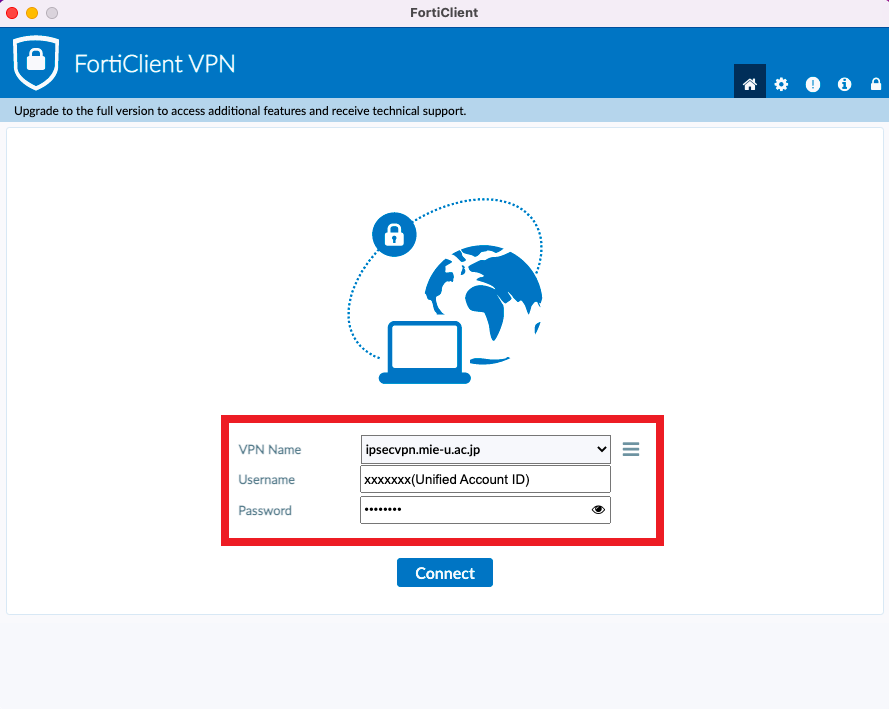
Enter your Unified Account ID and Unified Account Password, then press “Connect”
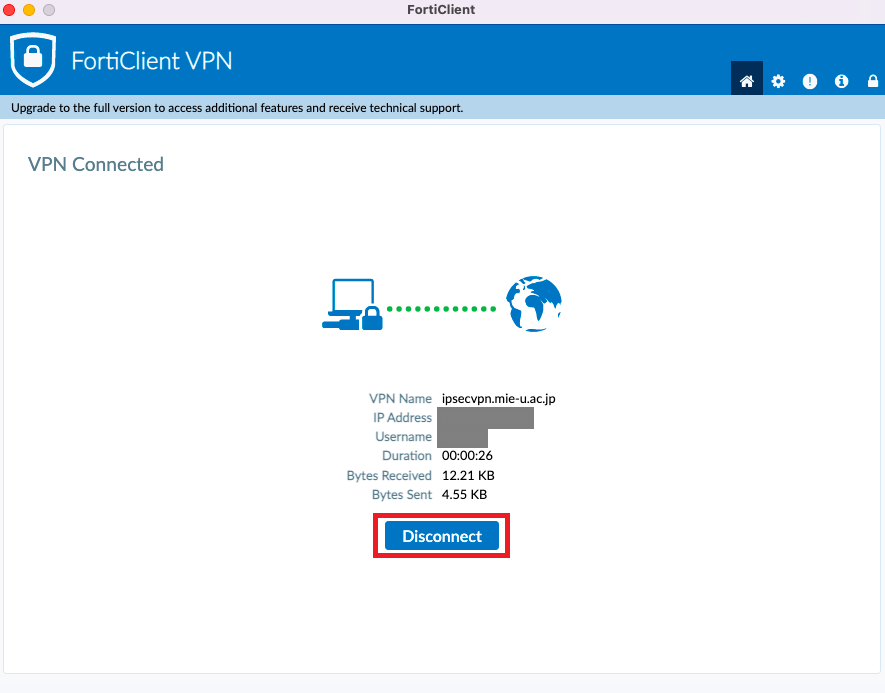
- Secure VPN has connected. Please verify that you can view the campus-restricted pages.
When you are finished using the service, be sure to press “Disconnect”.
※ ※ If you are using macOS 14 (Sonoma), downloads from the official website may not work properly.
if you encounter issuesFortiClientVPNSetup_7.2.4.0850_macosx.dmgPlease and try
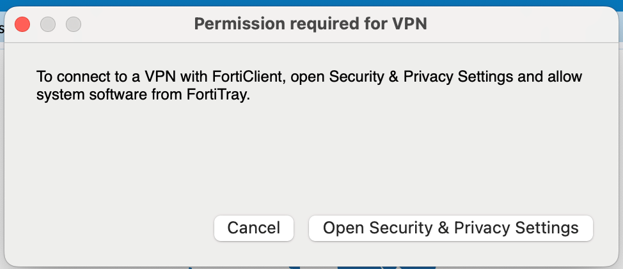
If you cannot connect
If you see a message like the one below and cannot connect to the VPN, it may be blocked by your Mac's settings.
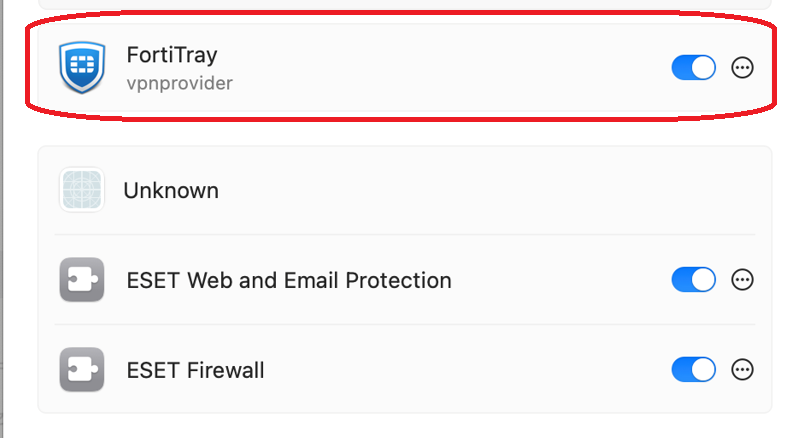
For Mac OS 15 and later
Mac Go to Mac's “System Settings” > ‘General’ > “Login Items and Extensions”.
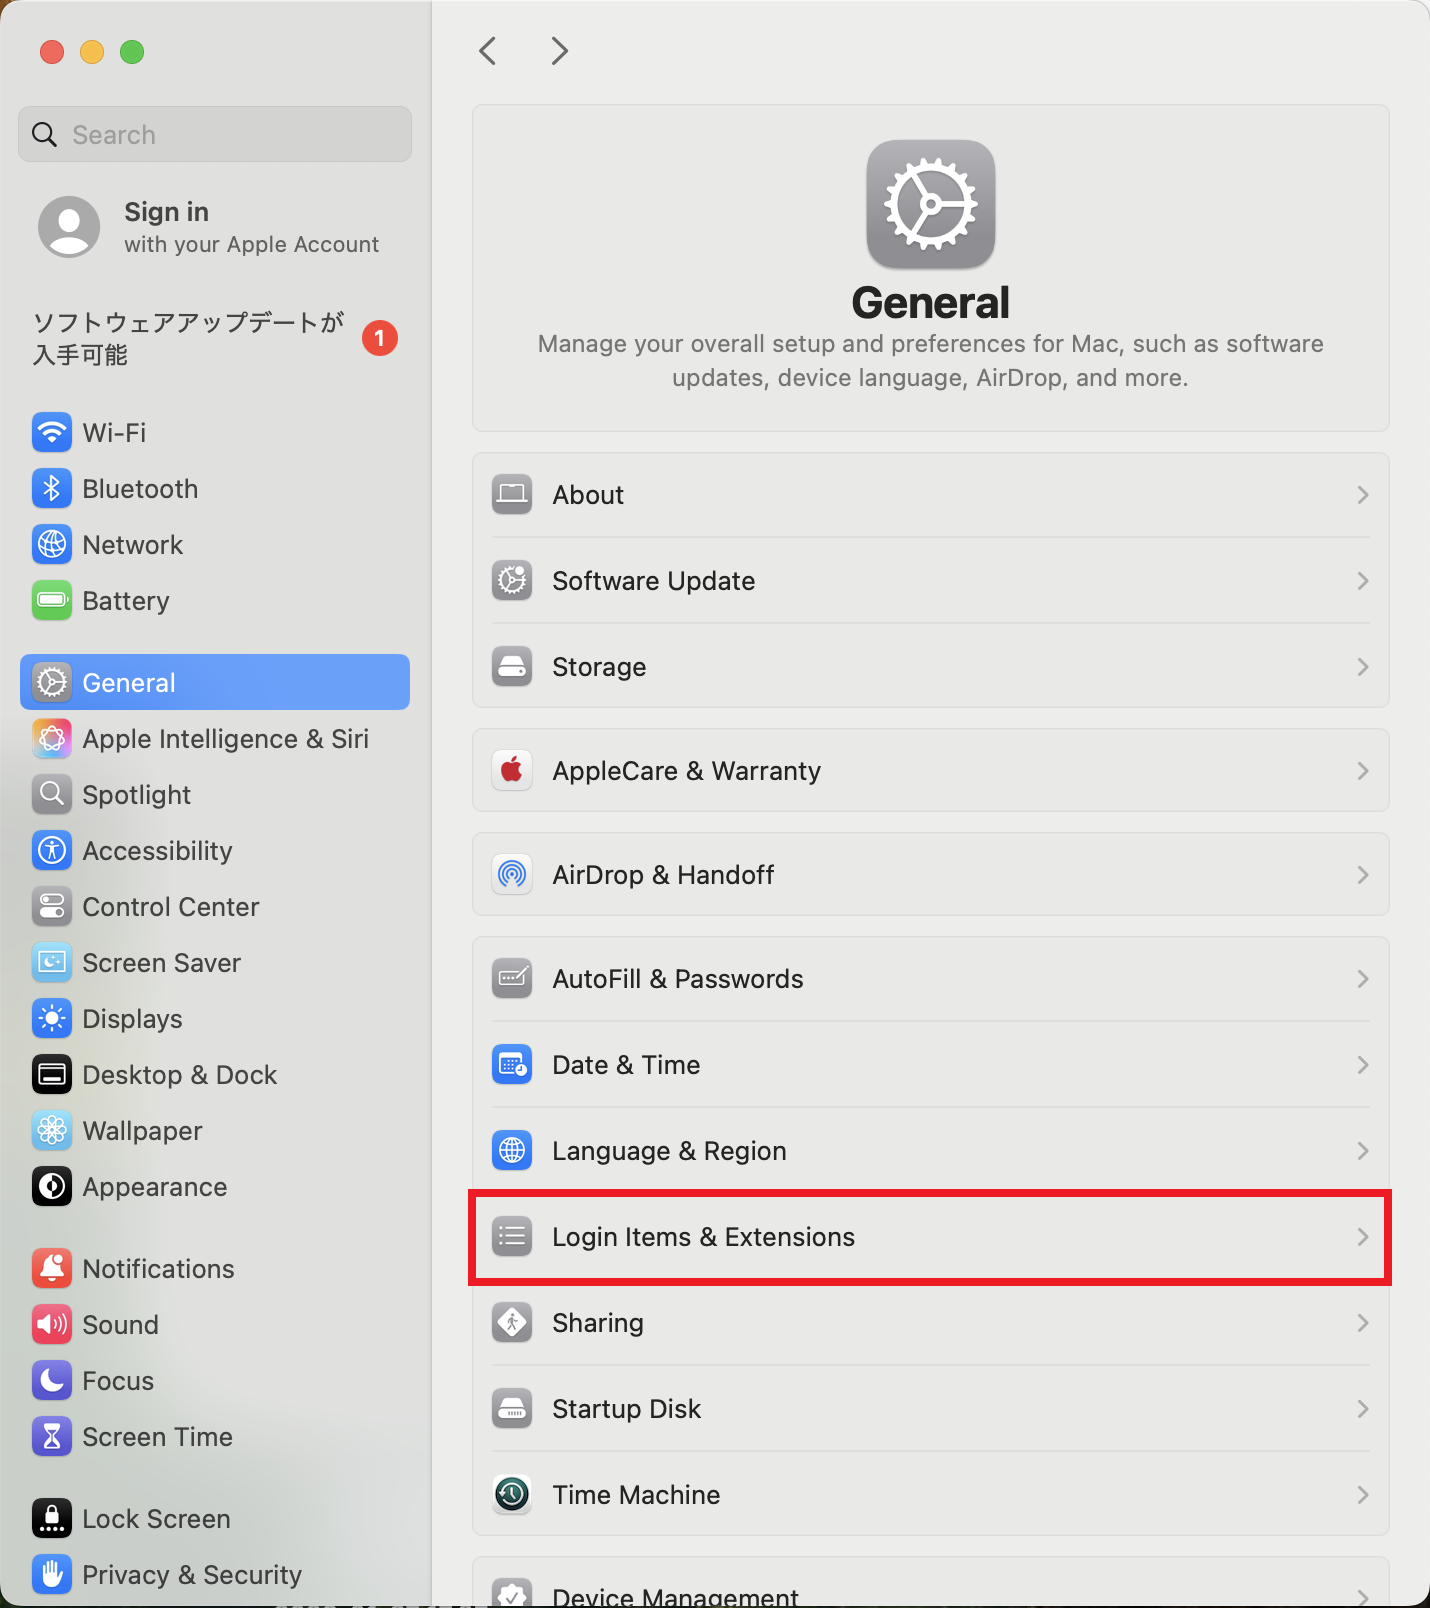
Turn on “FortiClientAgent”.
